Monday 26 October 2009

News at last

Hello! I'm back! I can only apologise for the prolonged absence. So without further ado here's what's been happening on Matt's Patch in September and October.

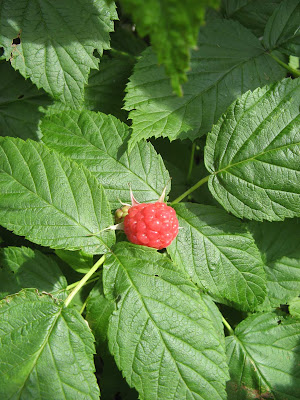
After all the rain we've had in August the last two months have been gorgeously warm and dry. This has helped keep the raspberries coming. This is how many we picked yesterday (with still plenty on the canes as we head into the shorter days of November):
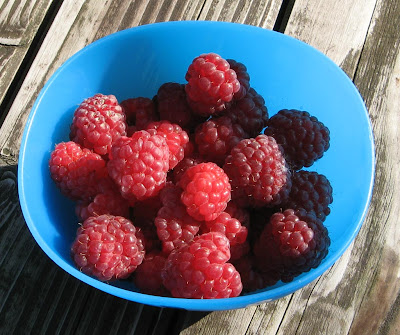
latest raspberries
Raspberries still going

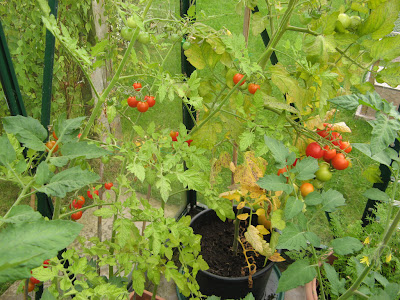
Along with the raspberries our tomatoes in the greenhouse kept cropping too. Now though they have slowed down so I decided to harvest them all. The plan is to make a green tomato chutney - I'll have to dig out a recipe somewhere (unless someone can recommend one).
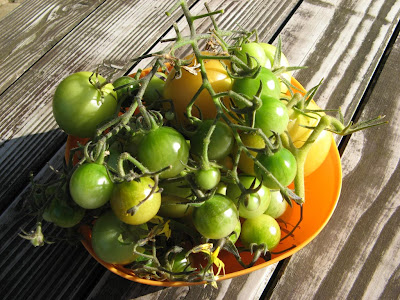
green tomatoes
Last of the tomatoes

Back in June we planted carrots in two buckets in a corner of the greenhouse. We just let them get on with it. The thinking was that as they got bigger, I'd thin them out as and when we needed little carrots for the children. However they never really seemed to take off. Maybe they were too densely planted. Anyway, on the weekend Megan and I picked what was left in the buckets. Their sizes varied quite considerably, and considering that they were a small variety we did get some decent sized ones. After a clean-up this is what we were left with:
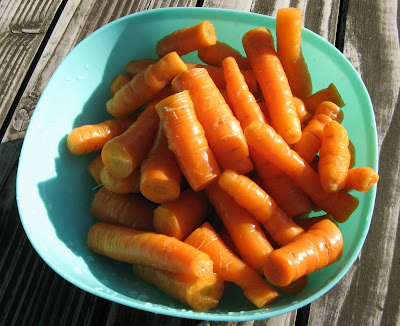
orange carrots
Bright orange carrots

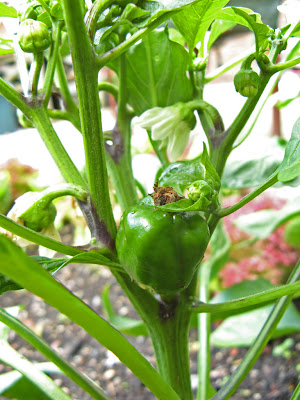
On to my planter. Although the last couple of months have been very mild, the lettuce that was in the planter just stopped growing. Likewise the peppers never did much. I think they definitely need to be in the greenhouse, or at the very least under some cover to get extra heat. This is the best one, from of six plants! (unfortunately the photo is out of focus but by the time I noticed the pepper had been used in a chili con carne!) red pepper
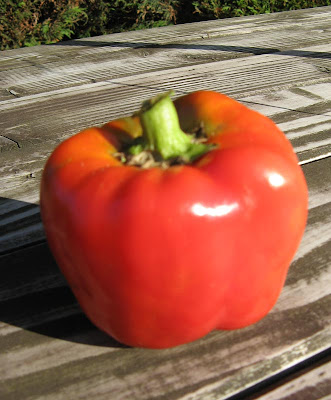
One red pepper

So, after collecting the veg that was still in the greenhouse, the time came to give it a good clean and get it ready for more planting.

So I'm going to have a little think now, about what can be planted - either in the planter or in pots in the greenhouse - which is unheated.
I'm also going to write up my experiences in the first year of Matt's Patch and what lessons have been learned.
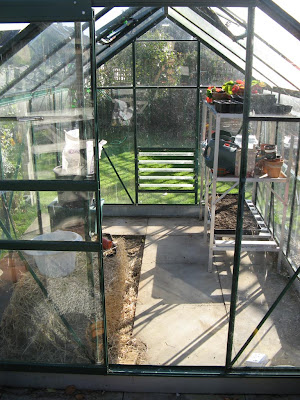
clean greenhouse
A nice clean greenhouse
Sunday 30 August 2009

Spud Issues

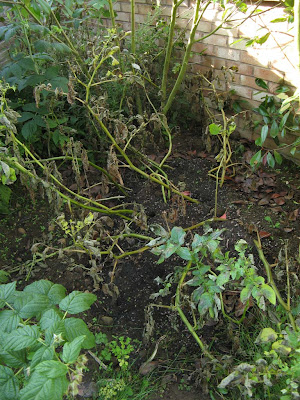
It's not all plain sailing in Matt's Patch. The other week I was out inspecting things and had a look at the potatoes that were growing at the end of the garden. This is what I found - all the foliage was just about dead!
dead foliage
Dead foliage - is this blight?

I've no idea what had caused it so I did a bit of digging (no pun intended) on the internet after hearing horror stories about blight.

Still not a lot wiser I read one article about blight that said you should cut off all the vegetation and burn it if possible. Then not dig the potatoes for a couple of weeks so that the blight that falls on the earth dies before the potatoes come up. So as a precaution I cut it all down and got rid.

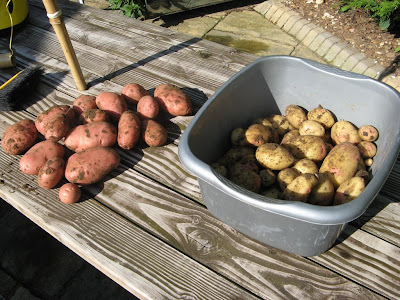
When we returned from our week camping in Cornwall, Megan and I went to dig up the spuds - if there were any! Actually we got quite a lot:
potato harvest
Desiree and King Edwards

Ideally they'd have been left to grow for longer so that the King Edwards got bigger but that was not an option in this case.

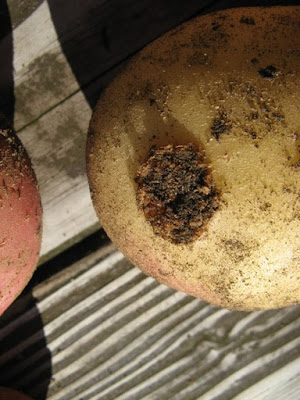
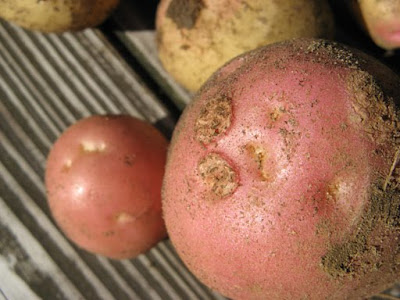
Upon closer inspection some of the individual potatoes had lesions on them. Not all of them, and not all over the ones that did have them.
potato disease
What is this?


potato disease
Some of the potatoes had scabs on them

I now think that this is scab, probably Common Scab but if anyone knows for sure then please let me know and what I could have done to prevent or treat it.

All in all, not too bad for my first experiment with growing potatoes!

Friday 28 August 2009

Too busy to blog

Blimey - it's the end of August and I have not written a word this month on Matt's Patch! That's not acceptable at all!

Well, we've all been a bit busy, with visiting family in Pembrokeshire, camping in Cornwall amongst other things.

While we were were away last week, we asked our neighbour Chris to look after the greenhouse and water the toms and cucs. It's a lot of responsibility looking after the Patch!
This is what we came back to - lots of gorgeous red tomatoes!
red tomatoes
Lovely red tomatoes

Plus a couple of large cucumbers and a good few raspberries too! Chris should look after things a bit more often!

Wednesday 29 July 2009

Rain Rain Go Away

harvest
Most recent harvest - then it rained. And rained ...

This was our harvest from Matt's Patch last weekend. Lettuce, cucumber, courgettes, raspberries and some rocket that has come under attack from caterpillars. Not bad I think. Since then it has rained and rained and rained. I can't believe how much rain there is up there!

tiny green peppers
6 Pepper plants - all with peppers like these

In the raised planter I have 6 pepper plants which are doing quite well despite the efforts of the weather to stall their growth. They all have peppers of various sizes now but I know that if it warmed up a few degrees and stayed dry for a week they would come on tremendously.
I have toyed with the idea of putting perspex screens around the edges of the planter to give more shelter to the plants in there but it's just a pipe-dream at the moment.

Wednesday 15 July 2009

First Cucumber

first cucumber
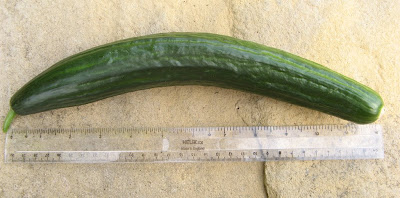
This is our first cucumber - with plenty more to come

Tonight I picked our first cucumber. I thought it was plenty big enough and when measured it was about 12 inches long (more if you take the curve into account - the EU won't be pleased). Looking at the plants there are plenty more to come so we'll be having cucumber sandwiches all summer. Well, I'm more sure of having cucumbers than I am of having a summer! The variety is Aurelia F1 and it's an all female variety which means there are no male flowers to risk the fruit getting pollinated and going bitter. Saying that I have not tasted it yet! The four seeds were planted on 7th May so have produced fruit in about 9 weeks. They have been getting regular feeding once the flowers appeared so that should have helped.

Along with the cucumber I dug up the remaining Charlotte potatoes from the recycling container. We want to eat them on the weekend and I've dug them up now to give their skins time to mature. The others we've had have lost their skins during boiling and I think this is because they are too fresh.
This is the last of our early potatoes. The rest are King Edwards and Desiree which are still going strong in their corner of the garden.
potatoes and cucumber
Today's harvest - Charlotte potatoes and Aurelia F1 cucumber

Sunday 12 July 2009

Project Scythe : Success

[Following on from this post]

Blimey that was quick! I only ordered the replacement parts on Friday morning and they arrived the next day (yesterday). I was too busy then to try anything out so today was my first chance to have a play.

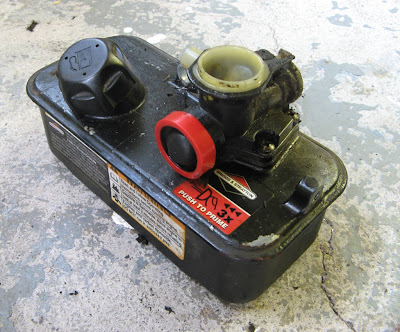
First thing was to remove the whole tank and carburettor assembly. This wasn't too tricky - the hardest bit was removing the throttle cable.
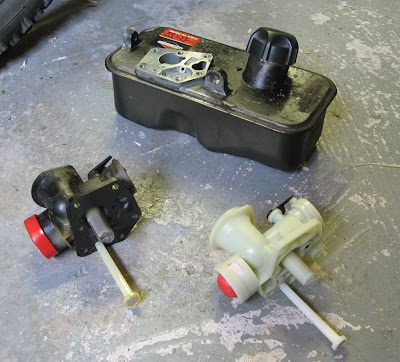
old carburettor
The old carburettor still attached to fuel tank

Next up was to remove the carburettor from the tank. This is a simple case of undoing the 5 screws holding it on. Once it was off I gave the tank a good clean to remove all the crud that had built up around the mount points.
both carburettors
The old and the new

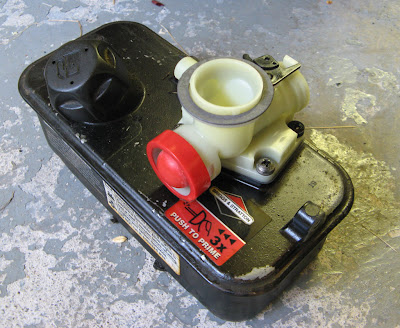
Although the new carburettor came pretty much assembled, there were still a few screens and springs to put in position. Once these were in place, it was a case of placing the diaphragm and gasket on the tank and then positioning the new carburettor on top. After doing up the screws the job was done.
new carburettor on tank
New carburettor on the cleaned up tank

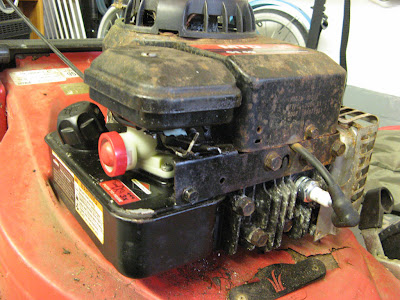
Then came the tricky bit of putting the tank/carb back on the mower. Again the throttle cable tried to be awkward but after a bit of negotiation it was back in place and all tightened up. I then replaced the spark plug. However I left it unplugged as a precaution.
new carburettor in position
The newly assembled carburettor and tank in situ

Then it was ready for testing. I moved the mower outside and onto a piece of lawn. I primed the carb three times with the new bulb. It seemed to work perfectly, I could hear the fuel squirting up! Then I pulled on the started cord.
Nothing.
Again. Nothing.
Feeling slightly deflated I realised that I was no further on than I was before. So I walked around the front of the mower and ... hah! I'd forgotten to reconnect the spark plug! I quickly plugged it in and pulled again on the cord. Still nothing. I re-primed the carb and then pulled on the cord once more.
Success! With a puff of white smoke the engine burst into life for the first time in over a year!
working lawn mower
Success! The mower is working!

After that it was a case of working out how the mower worked. Then off to mow the lawns in record time. So much easier when you don't have to mess about with power leads.

The next things I need to do are get the blades sharpened and replace the air filter with the one I bought.

But Project Scythe has been a complete success and I'm hugely pleased with how it's turned out.

Friday 10 July 2009

Project Scythe

Our electric lawnmower has given up the ghost. It started producing smoke from areas where it shouldn't - namely the motor! I can still smell the electric burning smell now.

The electric mower was getting to be a bit of a pain anyway, mostly because we have two lawn areas at the front of the house, an L-shaped lawn round two sides and a triangular lawn where the greenhouse is. So when we mow the lawns there is a lot of plugging and unplugging of electric extension cables to be done. A petrol mower would solve this particular problem. However, petrol mowers are much more expensive than their electric equivalents.
As luck would have it, Mrs. Matt's sister has donated her old petrol mower which fails to start. I have a few weeks to get it working before the grass gets over our heads.

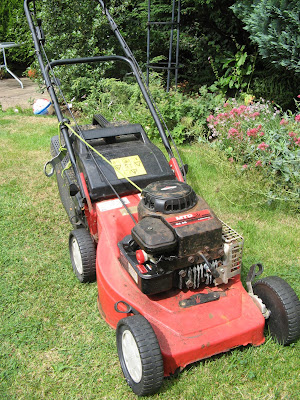
Welcome to Project Scythe!
project scythe
Project Scythe - the mean machine

Now, there is one slight problem with this kind of project - I know next to nothing about engines. But why let that stop me.
First off was a quick bit of cleaning around the engine, removing bits of grass that were there from the last time it worked, over a year ago.
briggs and stratton powered mower
10 year old lawnmower with 3.5hp Briggs and Stratton engine

Then the investigative work began. It's a Briggs and Stratton engine, 3.5hp. According to the engine plate on the front, it's Model 9D902, Type 2006 E1, Code 98072954.
I've since learned that the Code is the date when the engine was made, in the format YYMMDDxx. So this engine was made on 29th July 1998 - almost exactly 10 years ago.
All this information is essential when ordering replacement parts as B&S make so many different engines.

Once I'd got some petrol and fashioned a funnel out of an old pop bottle, it was time to put some fuel in the tank and see what happened. Once the fuel was in, it needs to be moved into the carburettor, ready to go into the cylinder for ignition.
The thing that moves this initial bit of petrol is the primer bulb, a sort of rubber suction device. The little label next to it says to press it three times. Well after the first press it never came out again. I tried pressing it in a few more times to see if it would pop out but no. Anyway, I thought I'd try and turn the engine over and see what happened. It seemed to turn over ok, but not do a lot else.
carburettor primer bulb
The primer bulb refuses to pop out once pushed

So the initial diagnosis it that there's a problem with the primer bulb or some of the jets and tubes feeding it. I tried removing the bulb and then the carburettor but had no luck with either. I did all this after unplugging the spark plug just in case of a discharge while I'm messing with the fuel feeds - I read that somewhere. I think. So I decided to put things back together and then retreated to the PC and did some searching.
I found one site which gives details of removing a very similar carburettor. You need to remove the carb and fuel tank as one unit first, then remove the carb from the tank. It also details how to remove the primer bulb!
After looking and reading about all the bits that could be wrong in there, I decided to buy a whole new carburettor with all the gubbings (including the primer bulb assembly). While I was ordering I also picked out a new spark plug, air filter and some fuel conditioner (apparently petrol goes old and can gunk up the workings when left for a while). The whole order has come to £28.48 at the moment. Plus the £3 I've spent on petrol.

So that's where Project Scythe is at the moment: Awaiting parts.

UPDATE: This is the next page of Project Scythe

Wednesday 8 July 2009

Cucumber Forrest

The cucumbers have gone mad! Since my last post a few days ago, the biggest cucumber seems to have had a growth spurt and must now be be about 9 or so inches long. It's getting fatter too!
cucumber getting bigger
Cucumber getting bigger every day

And while I was distracted with that cucumber, the others seem to have come on in leaps and bounds too. Every leaf junction has got a fruit on, and I have three plants! They are taking over the whole greenhouse with tendrils and side shoots going everywhere, grabbing on to what ever they can, be it French Beans or tomato plants! I'm going to have to do some serious moving about in there whilst I can still get in.
cucumber plants
Cucumber plants are taking over the greenhouse
Sunday 5 July 2009

Red Raspberry

I went out this early this evening to water a few things and this is what I found. A bright red raspberry, almost glowing in amongst the verdant green leaves of the canes. After calling the girls out (there will be a lot more competition for ripe raspberries as everyone likes them, as opposed to strawberries which Mrs Matt doesn't like - not even in Pimms!) and a lot of build up, the raspberry was not quite ripe so refused to budge! Patience is a virtue as they say.
first red raspberry
This is our first raspberry to turn red

French bean harvest
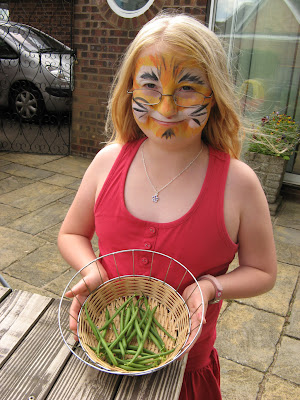
After the local school fete Emily helped me go round the French bean plants and gather our first harvest. They're sneaky things and hide themselves very well in the stalks of the parent plant.
emily and french beans
Emily (as a tiger) helped me harvest our first French Beans

Cucumber update
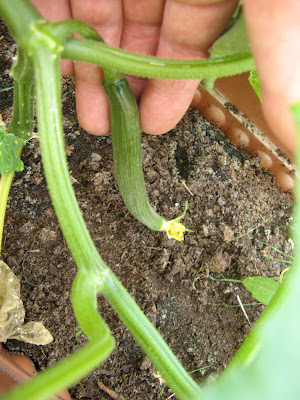
This is the latest picture of the most advanced cucumber - it's about 5 inches long. It seems to be quite wrinkly, as if it has all its skin and is slowly filling it up!
cucumber
First cucumber is about 5 inches long now

Charlotte potatoes
After the somewhat disappointing showing of the Red Duke of Yorks I had a quick look at the Charlotte potatoes that are growing in the patch at the end of the garden. I thought the foliage was dying back a bit so decided to get the fork and have a snoop under the ground. What I found reassured me that all is well! I found a few good sized tubers and once I'd found some I could not resist digging both the plants up! We have cold roast chicken, fresh new potatoes and salad with our own lettuces. Excellent. We have more than twice the amount shown in the picture but Mrs Matt had started cooking them before I could get my camera out!
charlotte potatoes
Some of the Charlottes from the potato patch

Tuesday 30 June 2009

Potatoes!

On Saturday and with great anticipation Emily and I picked the two Red Duke of Yorks that had been growing well in an old recycling container on our patio. We turned it out and started rummaging through the compost expecting a bumper crop of spuds.
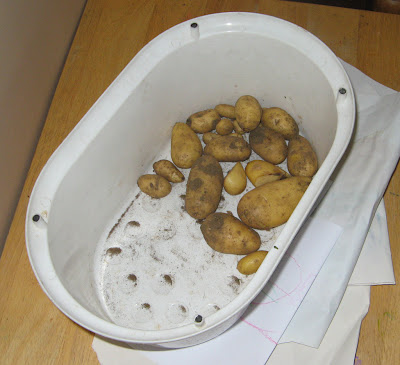
This is what we managed to get from two plants that had been growing since early April:
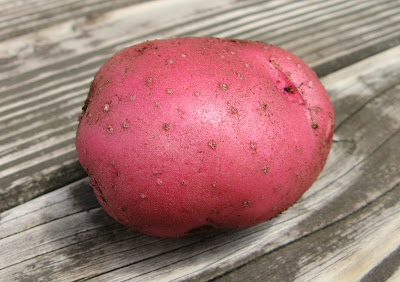
haul of red duke of york
Red Duke of Yorks from two plants

In order to supplement the potatoes for the evening meal Em and I then picked the broad beans that were ready. It's probably a reasonable amount from four dwarf Sutton plants.
broadbeans
We picked all the broad beans that were ready

Once picked Em and her granddad set about shelling them. We offered the bean cases to Patch the guinea pig but, understandably, she turned her nose up at them!
em and her granddad shelling beans
Emily and her granddad shelling beans

One benefit of growing potatoes in containers is that they come out of compost a lot cleaner than out of the soil. Speaking of soil, I did plant one Red Duke of York down in the potato patch at the end of the garden. Emily and I dug up that plant but found nothing apart from one tiny little tuber. Anyway, after a nice cleanup the potatoes were ready for their weigh-in. They came in at 862g which is 1lb 14oz in old money. With the potato I snaffled a couple of weeks earlier, I reckon that's 2lb of spuds, 1lb per plant. I don't know how good that is. It doesn't sound a lot and I was expecting more. Maybe I should have watered more.
all cleaned up and ready for the weigh in
Beans and Pots all cleaned up and ready for the weigh in

So we enjoyed the potatoes and broad beans with some gammon and parsley sauce, eaten al fresco. Beautiful.

Monday 22 June 2009

Strawberry Cuttings

On Saturday I was taking care of our little strawberry patch. I know you are meant to put straw under the plants to keep the fruit off the floor to stop them going rotten. Now we don't have straw, but we do have some hay which is used for Patch the guinea pig. And seeing as Patch likes the cut off tops of strawberries, I think it's only fair that some of her hay is used for the purpose of getting better strawberries. She'll reap the rewards - eventually!

So while I was putting a bed of hay down under the plants I noticed a few runners stretching across the patch. Now these are only young plants so I don't want them putting lots of energy into producing runners so I started to cut them off. I discovered that they had started to try and put down roots in several places. As an experiment I collected up the tiny little rooted plants and put them in pots more as an experiment than anything else. There were four in total at various stages - some not much more than a leaf or two and one only had little stubs rather than real roots. If they work then all well and good but I'm not really expecting much. Saying that, it's been a couple of days and they have not died yet!
strawberry cuttings
Tiny little strawberry cuttings - see how they grow

I think the best way to take cuttings from strawberry plants is to let the runner grow and place pots full of compost along it at the points where it wants to root down. Then gently peg the runner down into the pot so that it grows in the pot. Once it's nicely established the new 'sister' plant can be severed from the 'mother' plant. I'll try this later in the year.

Friday 19 June 2009

Cucumber Update

cucumber plants in pots
Our three cucumber plants in troughs

It's been just over two weeks since I planted the three cucumber plants in troughs (there were four, the fourth being very weak and suffering from root rot. RIP). They've been doing very well and I'm trying to not water them too much. Luckily the weather's been helping me out by being rather cold and miserable!

This morning, however, I decided to have a close inspection of the plants to see what I could see. I thought cucumbers grew off stalks that in turn grow off the main stem (a little like tomatoes) but it turns out they grow right off the main stem, just where the leaves join. At the moment they are tiny. This one is about the biggest and it's about 1cm long. There are quite a few on all three plants, easily identified by the star-like flower bud.
tiny cucumber
Tiny cucumber - the flower's not anywhere near ready to open

Hopefully the weather will warm up a notch and they'll thrive.

Meanwhile, in another part of the garden - well, several parts of the gargen - there are the French Beans which are starting to flower now. Not very exciting flowers it has to be said. But so long as they do the job they're ok with me. This is the most advanced plant with maybe half a dozen pods on it, these being the biggest.
thin french beans
Slowly but surely, the arrival of French beans

Monday 15 June 2009

Pride before a fall

After the massive confidence boost of Saturday's potato find, we thought it would be nice to enjoy some of the beautiful potatoes with last night's dinner. So Emily and I headed off to the container where the Red Duke of Yorks are growing. Emily was holding the little basket ready for taking our treasures back to the house. I explained the rules of engagement, just in case: "If we only find small ones then we stop looking". After quite a bit of tentative searching in the potato equivalent of a lucky dip, this is what I found:
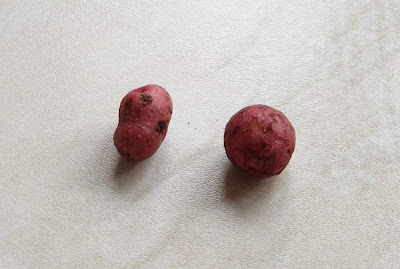
two tiny spuds
Not the biggest potatoes we've ever seen

These two monsters measured about 1cm each! Emily was keen to dig up the whole lot in the quest for bigger spuds but I got cold feet and abandoned the whole search. So it was heavy hearts and an empty basket that we headed back to the house. In fact we did find a bigger potato but it was half rotten and old looking - I'm fairly sure it was one of the seed potatoes that got planted originally.

Anyway, not to be out done, I put the tiny little marble-like potatoes in the oven whilst our dinner was cooking. Although they were very small, when they were cooked they still tasted great.

I've since been trying to find out when the potatoes should be ready. Reports vary from 1 week to 3 weeks after the first flowers appear. Now, our flowers appeared a good two weeks ago, and Saturday's potato can't be the only decent one there, surely. Maybe we gave up too soon. I think I'll wait until next weekend and then have a braver search.

Saturday 13 June 2009

First Potato!

first red duke of york
Our very first Red Duke of York!

We have a potato! YES!

This morning Emily was looking at the potato plants in the containers and asking when they'd be ready. So I decided to have a furtle about in the Red Duke of Yorks. After a little blind searching this is what I came out with! I was well chuffed! Look at the great colour. Although Emily doesn't look too sure about it.
Em looking af first potato
Em's wondering how it'll feed our family of four

We simply boiled it all on its lonesome (skin on of course) and ate it with some butter on it. It tasted great and everyone liked it. We might get some more up for tomorrow's evening meal.

I'm not sure what makes it so satisfying about growing potatoes. Maybe it's the same with other root vegetables. I think it's the fact that you are not certain you'll get anything until you start digging. With the regular vegetables that grow above ground you can see them getting a little bit bigger every day. But potatoes are different. It's like setting them off on autopilot when you plant the original tuber and hope that they do what they're supposed to do by the time you come to dig them up.

Thursday 4 June 2009

First Courgette

Meet our first courgette! Picked this very morning. Ok, so it's a little wonky and wouldn't make it past an EU market inspector but hey - it's the first proper produce from Matt's Patch (lettuce doesn't really count). So, in anticipation of a glut of courgettes I've been looking up recipes. Obviously there's fritters, but I'm more interested in Courgette Cake (a bit like carrot cake but, you've guessed it, with courgette instread). Another recipe I've found was on a Waitrose card for Minted Courgette Soup.
first courgette
First courgette - hopefully one of many


I also thought I'd show the progress of the broad beans - they're coming along nicely. I've found a recipe for these too that I want to try - from the Guardian's gardening blog. I haven't planted our French beans out yet, so broad beans are all we've got to look at at the moment.
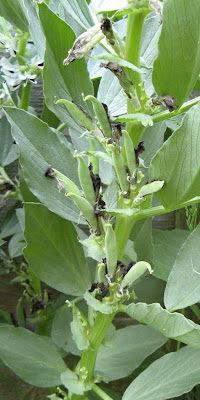
broad beans
Beans are getting fatter - won't be long now ...


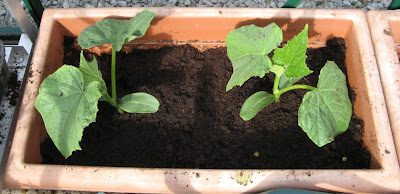
What I have done is to give the 4 cucumber plants a bigger home. This is two of them in a trough. As for the other two (not pictured), one is a bit of a runt so may not make it through the stress of moving house! Let's hope they do better than the last lot, otherwise I'll just give up with cucumbers.cucumbers in trough
Cucumbers have been moved to bigger homes


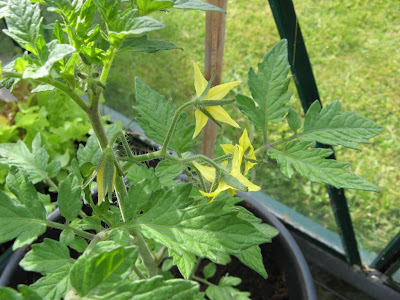
Our tomatoes seem to be quite a way behind other people's. Never the less, they have started producing flowers which I am duly tapping when I pass by to help with pollination. I'm also pinching out the side shoots that grow between the main stem and the side leaves. This leaves a nice smell of tomatoes on your hands! tomatoes in flower
A little late but we have tomato flowers


Emily and Megan can't wait for more sunshine to help ripen the strawberries. They're so very close to being ready it's painful. Even with the mesh over them, something has still managed to get in and half-eat a couple. Why do they do that? If you don't like strawberries LEAVE THEM ALONE! GRRRR!strawberries nearly red
mmmmm! Strawberries. Gorgeous!

Monday 1 June 2009

DIY New Planter

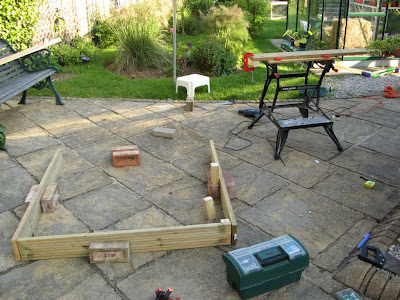
On our patio are two old and decrepit planters. They are falling apart and too rotten to mend so we decided to replace them. Over the glorious weekend I set about building a new one from scratch. With a length of 2x2, two decking boards cut in half for the sides and a sheet of plywood I was ready for action.
getting things set out
Getting things set out

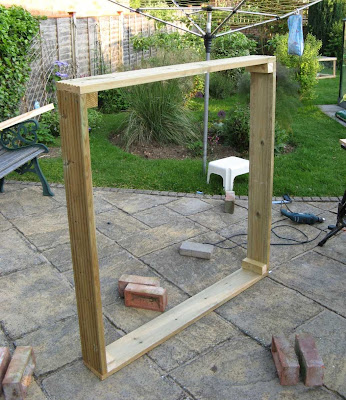
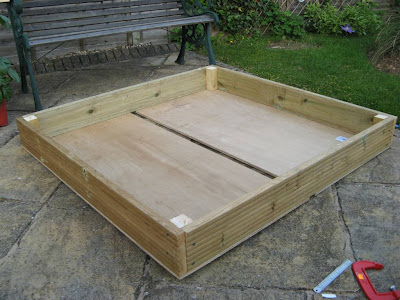
Four lengths of 2x2 were sawn to join the decking boards at the corners, with the screws offset from each other on each side. After a while I had the main frame completed. This proved a little more tricky than it looked as it was quite hard making sure everything lined up straight. The paved patio is not perfectly level so I couldn't really use that to get square.
outside frame
The outside frame is complete

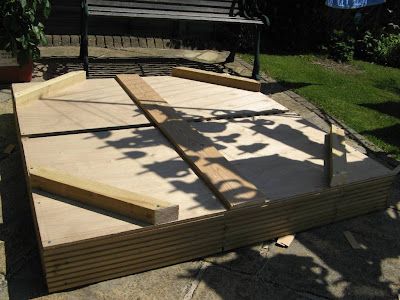
Once the frame was done it was time to cut the sheet of plywood and screw it into place. Due to the dimensions of the board, there was a slight gap down the center but this was good as it will be used for drainage. Honestly, it was planned that way.
plywood base added
The plywood base is on

I cut the remaining length of 2x2 into 4, mitred at 45°. These were attached to the corners of the base. An additional length of spare plank was cut and added across the base to support the plywood. I also mixed up some PVA primer with water to make a sealant and coated the plywood and any cut surfaces of wood. Hopefully this will help extend the life of the planter.
making supports
Added feet to keep planter off the ground

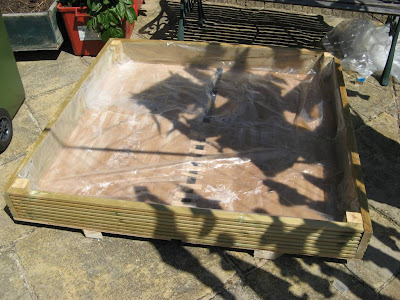
The decking boards had been pre-treated with preservative so to stop whatever chemicals are in there from leeching out and potentially getting into the plants I lined the whole inside with plastic. I then made a few cuts in it to allow excess water to drain out. Hopefully the plastic will help retain water too.
lined with plastic
Lined with plastic

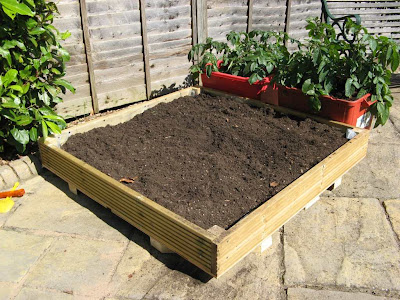
So with the planter completed, I started to fill it with earth reclaimed from one of the others that was being replaced. After a few bucketfuls had gone in it dawned on me that I should put in in situ before filling it any more! I'd never be able to move the thing when full!
filled with earth
Nearly there - filled with earth

Once in place and filled I added some bonemeal and mixed it in well, then gave it a good soaking. Then it was off to the greenhouse to transfer some of the lettuces that had been growing. I also put in the bell peppers than needed a bigger home. Phew! So there it is, woodworking lesson #2. It looks great and I'm very pleased with it.completed planter filled with lettuces
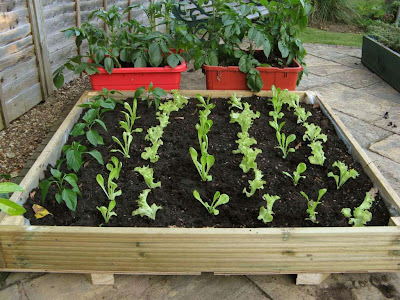
Done! Instant lettuces too!